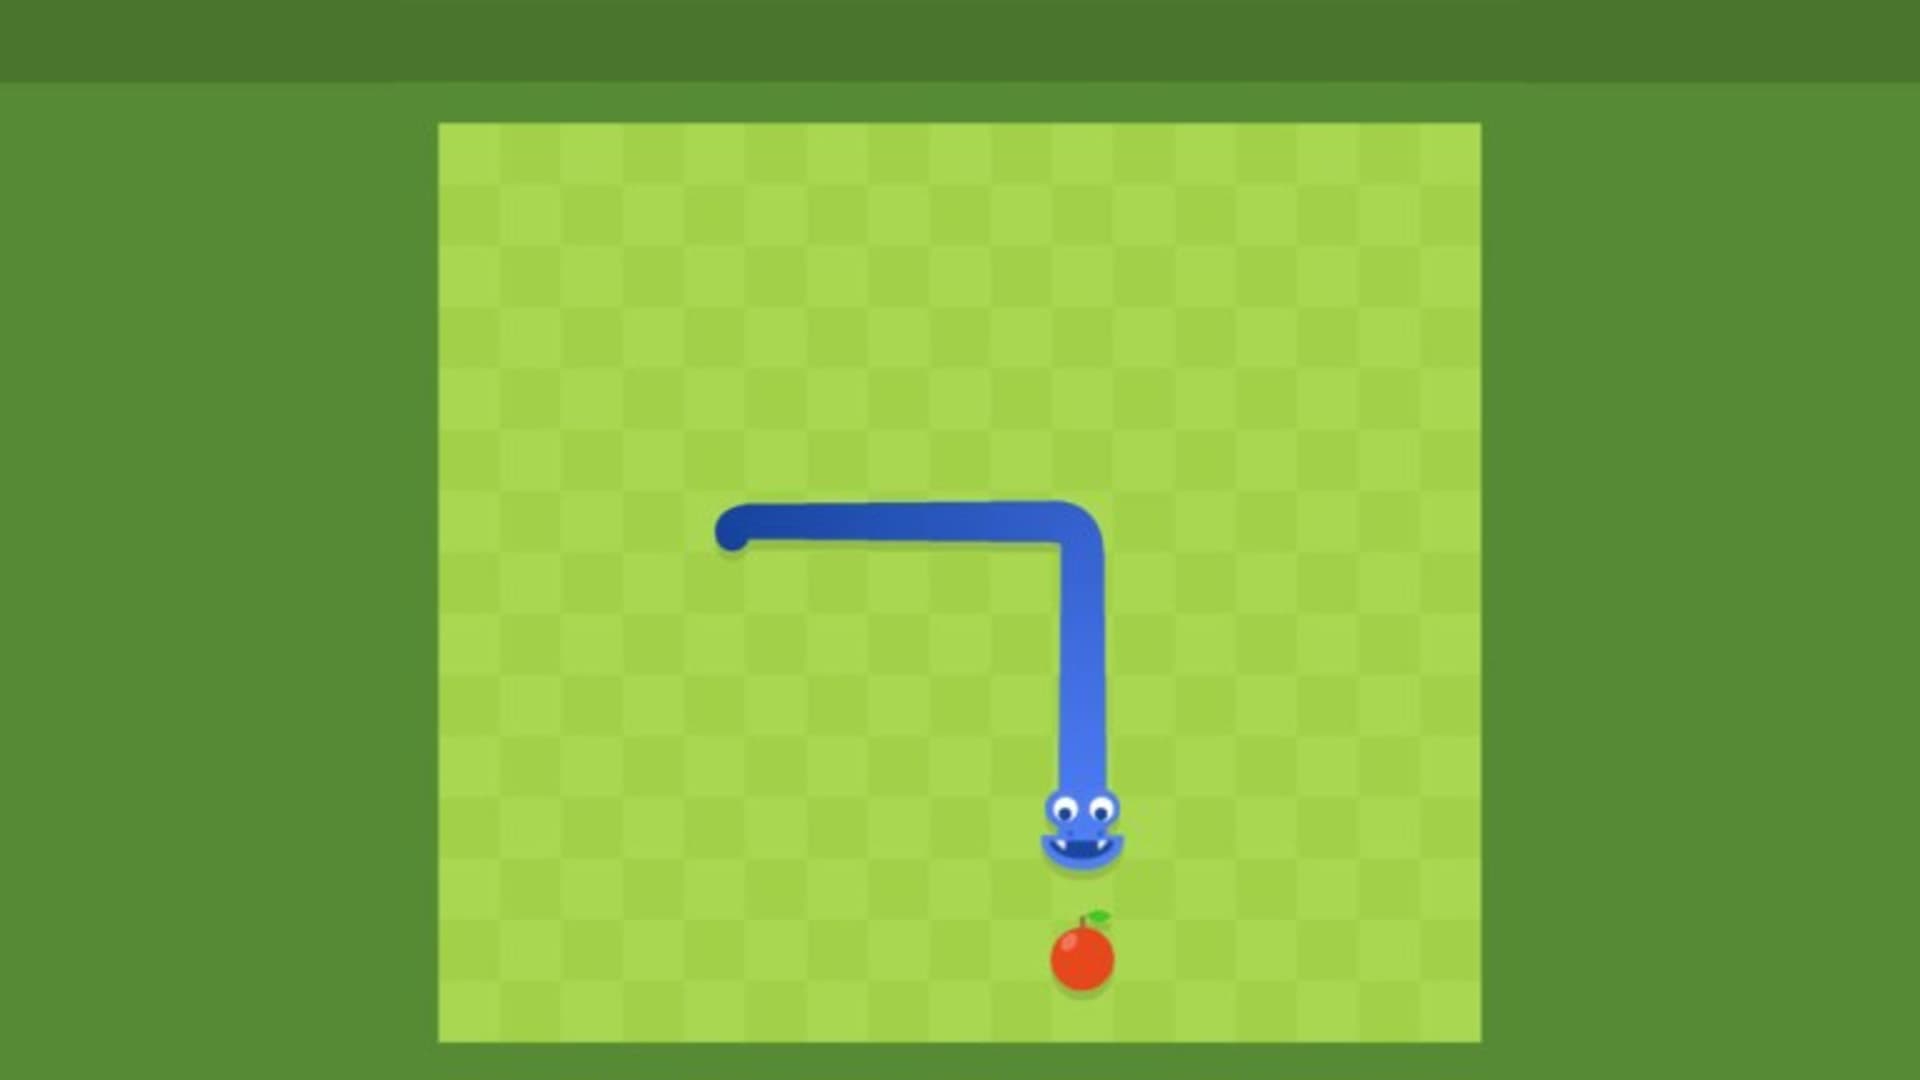
Creating a JavaScript snake game is a fun and rewarding project for both beginners and experienced developers. The snake game is a classic and simple concept, making it an excellent project to practice your JavaScript skills. In this article, we will walk through the steps to create a basic snake game using JavaScript. By the end, you will have a fully functional snake game that you can play in your browser.
1. Setting Up the Environment
To start, you need a basic HTML file where you will write your JavaScript code. Create an index.html file and set up the basic structure:
<!DOCTYPE html>
<html lang="en">
<head>
    <meta charset="UTF-8">
    <meta name="viewport" content="width=device-width, initial-scale=1.0">
    <title>JavaScript Snake Game</title>
    <style>
        body { display: flex; justify-content: center; align-items: center; height: 100vh; margin: 0; }
        canvas { border: 1px solid black; }
    </style>
</head>
<body>
    <canvas id="gameCanvas" width="400" height="400"></canvas>
    <script src="snake.js"></script>
</body>
</html>
2. Creating the Game Board
Next, create a snake.js file and start by selecting the canvas element and setting up the drawing context:
const canvas = document.getElementById('gameCanvas');
const ctx = canvas.getContext('2d');
const gridSize = 20; // Size of each grid cell
const rows = canvas.height / gridSize;
const cols = canvas.width / gridSize;
3. Implementing the Snake
Define the snake’s initial state and functions to draw it:
let snake = [
    { x: 10, y: 10 },
    { x: 9, y: 10 },
    { x: 8, y: 10 }
];
let direction = { x: 1, y: 0 };

function drawSnake() {
    ctx.fillStyle = 'green';
    snake.forEach(segment => {
        ctx.fillRect(segment.x * gridSize, segment.y * gridSize, gridSize, gridSize);
    });
}

function moveSnake() {
    const head = { x: snake[0].x + direction.x, y: snake[0].y + direction.y };
    snake.unshift(head);
    snake.pop();
}
4. Adding Food
Add functionality to place food randomly on the board and draw it:
let food = { x: 15, y: 15 };

function drawFood() {
    ctx.fillStyle = 'red';
    ctx.fillRect(food.x * gridSize, food.y * gridSize, gridSize, gridSize);
}

function randomFoodPosition() {
    return {
        x: Math.floor(Math.random() * cols),
        y: Math.floor(Math.random() * rows)
    };
}

function checkFoodCollision() {
    if (snake[0].x === food.x && snake[0].y === food.y) {
        food = randomFoodPosition();
        snake.push({}); // Add a new segment to the snake
    }
}
5. Handling User Input
Implement functions to handle arrow key inputs for snake movement:

document.addEventListener('keydown', event => {
    switch(event.key) {
        case 'ArrowUp':
            if (direction.y === 0) direction = { x: 0, y: -1 };
            break;
        case 'ArrowDown':
            if (direction.y === 0) direction = { x: 0, y: 1 };
            break;
        case 'ArrowLeft':
            if (direction.x === 0) direction = { x: -1, y: 0 };
            break;
        case 'ArrowRight':
            if (direction.x === 0) direction = { x: 1, y: 0 };
            break;
    }
});
6. Updating the Game State
Create a function to update the game state and check for collisions:
function gameLoop() {
    ctx.clearRect(0, 0, canvas.width, canvas.height);
    moveSnake();
    checkFoodCollision();
    drawFood();
    drawSnake();
    if (checkCollision()) {
        alert("Game Over!");
        document.location.reload();
    } else {
        setTimeout(gameLoop, 100);
    }
}

function checkCollision() {
    for (let i = 1; i < snake.length; i++) {
        if (snake[i].x === snake[0].x && snake[i].y === snake[0].y) {
            return true;
        }
    }
    return snake[0].x < 0 || snake[0].x >= cols || snake[0].y < 0 || snake[0].y >= rows;
}
7. Displaying the Score
Add functionality to keep track of and display the player’s score:
let score = 0;

function updateScore() {
    score = snake.length - 3;
    document.getElementById('score').innerText = `Score: ${score}`;
}

function checkFoodCollision() {
    if (snake[0].x === food.x && snake[0].y === food.y) {
        food = randomFoodPosition();
        snake.push({});
        updateScore();
    }
}
Update your index.html to include a score display:
<!DOCTYPE html>
<html lang="en">
<head>
    <meta charset="UTF-8">
    <meta name="viewport" content="width=device-width, initial-scale=1.0">
    <title>JavaScript Snake Game</title>
    <style>
        body { display: flex; flex-direction: column; justify-content: center; align-items: center; height: 100vh; margin: 0; }
        canvas { border: 1px solid black; }
        #score { font-size: 20px; margin-bottom: 10px; }
    </style>
</head>
<body>
    <div id="score">Score: 0</div>
    <canvas id="gameCanvas" width="400" height="400"></canvas>
    <script src="snake.js"></script>
</body>
</html>
8. Running the Game
Finally, start the game loop:
gameLoop();
9. Conclusion
Congratulations! You’ve created a basic JavaScript snake game. This project covered essential programming concepts such as handling user input, updating the game state, and drawing on a canvas. There are many ways to expand and improve this game, such as adding different levels, implementing better graphics, or optimizing the game logic. Enjoy coding and happy gaming!