How to Build a Free Personal Cloud Using Open-Source Tools
Open source tools for cloud drive, media streaming, and backup management.

Hello developers, in today’s article, I will show you how you can build your cloud using open-source tools for free. I will show you how you can store the files, stream media, and sync backup to the cloud server.
If you want to freely host this software, you can check out the following options —
- Google Cloud Free Tier
The free tier e2-micro compute instance comes with 0.25vCPU, 30GB disk storage, 1GB memory, and 200GB standard tier egress per month, and the region must be us-central1 | us-west1 | us-east1. - Oracle Cloud Always Free Services
AMD and ARM-based compute instances with varying free allowance and storage options (note: there were unconfirmed reports of randomly deleted “inactive” accounts). - IBM LinuxONE Open Source Software Community Cloud
Free IBM Z (s390x) VMs for open source projects (requires filling out a form).
Why Build a Personal Cloud?
This is the first question that comes to mind when we think of self-hosting any open-source application. So, a straightforward answer that I have for this is — for data privacy and cost for third-party services like Google Drive or Dropbox, etc. There must be more benefits of using the open-source SaaS, like you can develop custom features if you have technical knowledge, scale as per your demand, and flexibility is one of them.
Choosing The Right Tool For You
I am using various open-source tools for my cloud, but for file management, media streaming, and backup, I am using the following tools.
File Browser
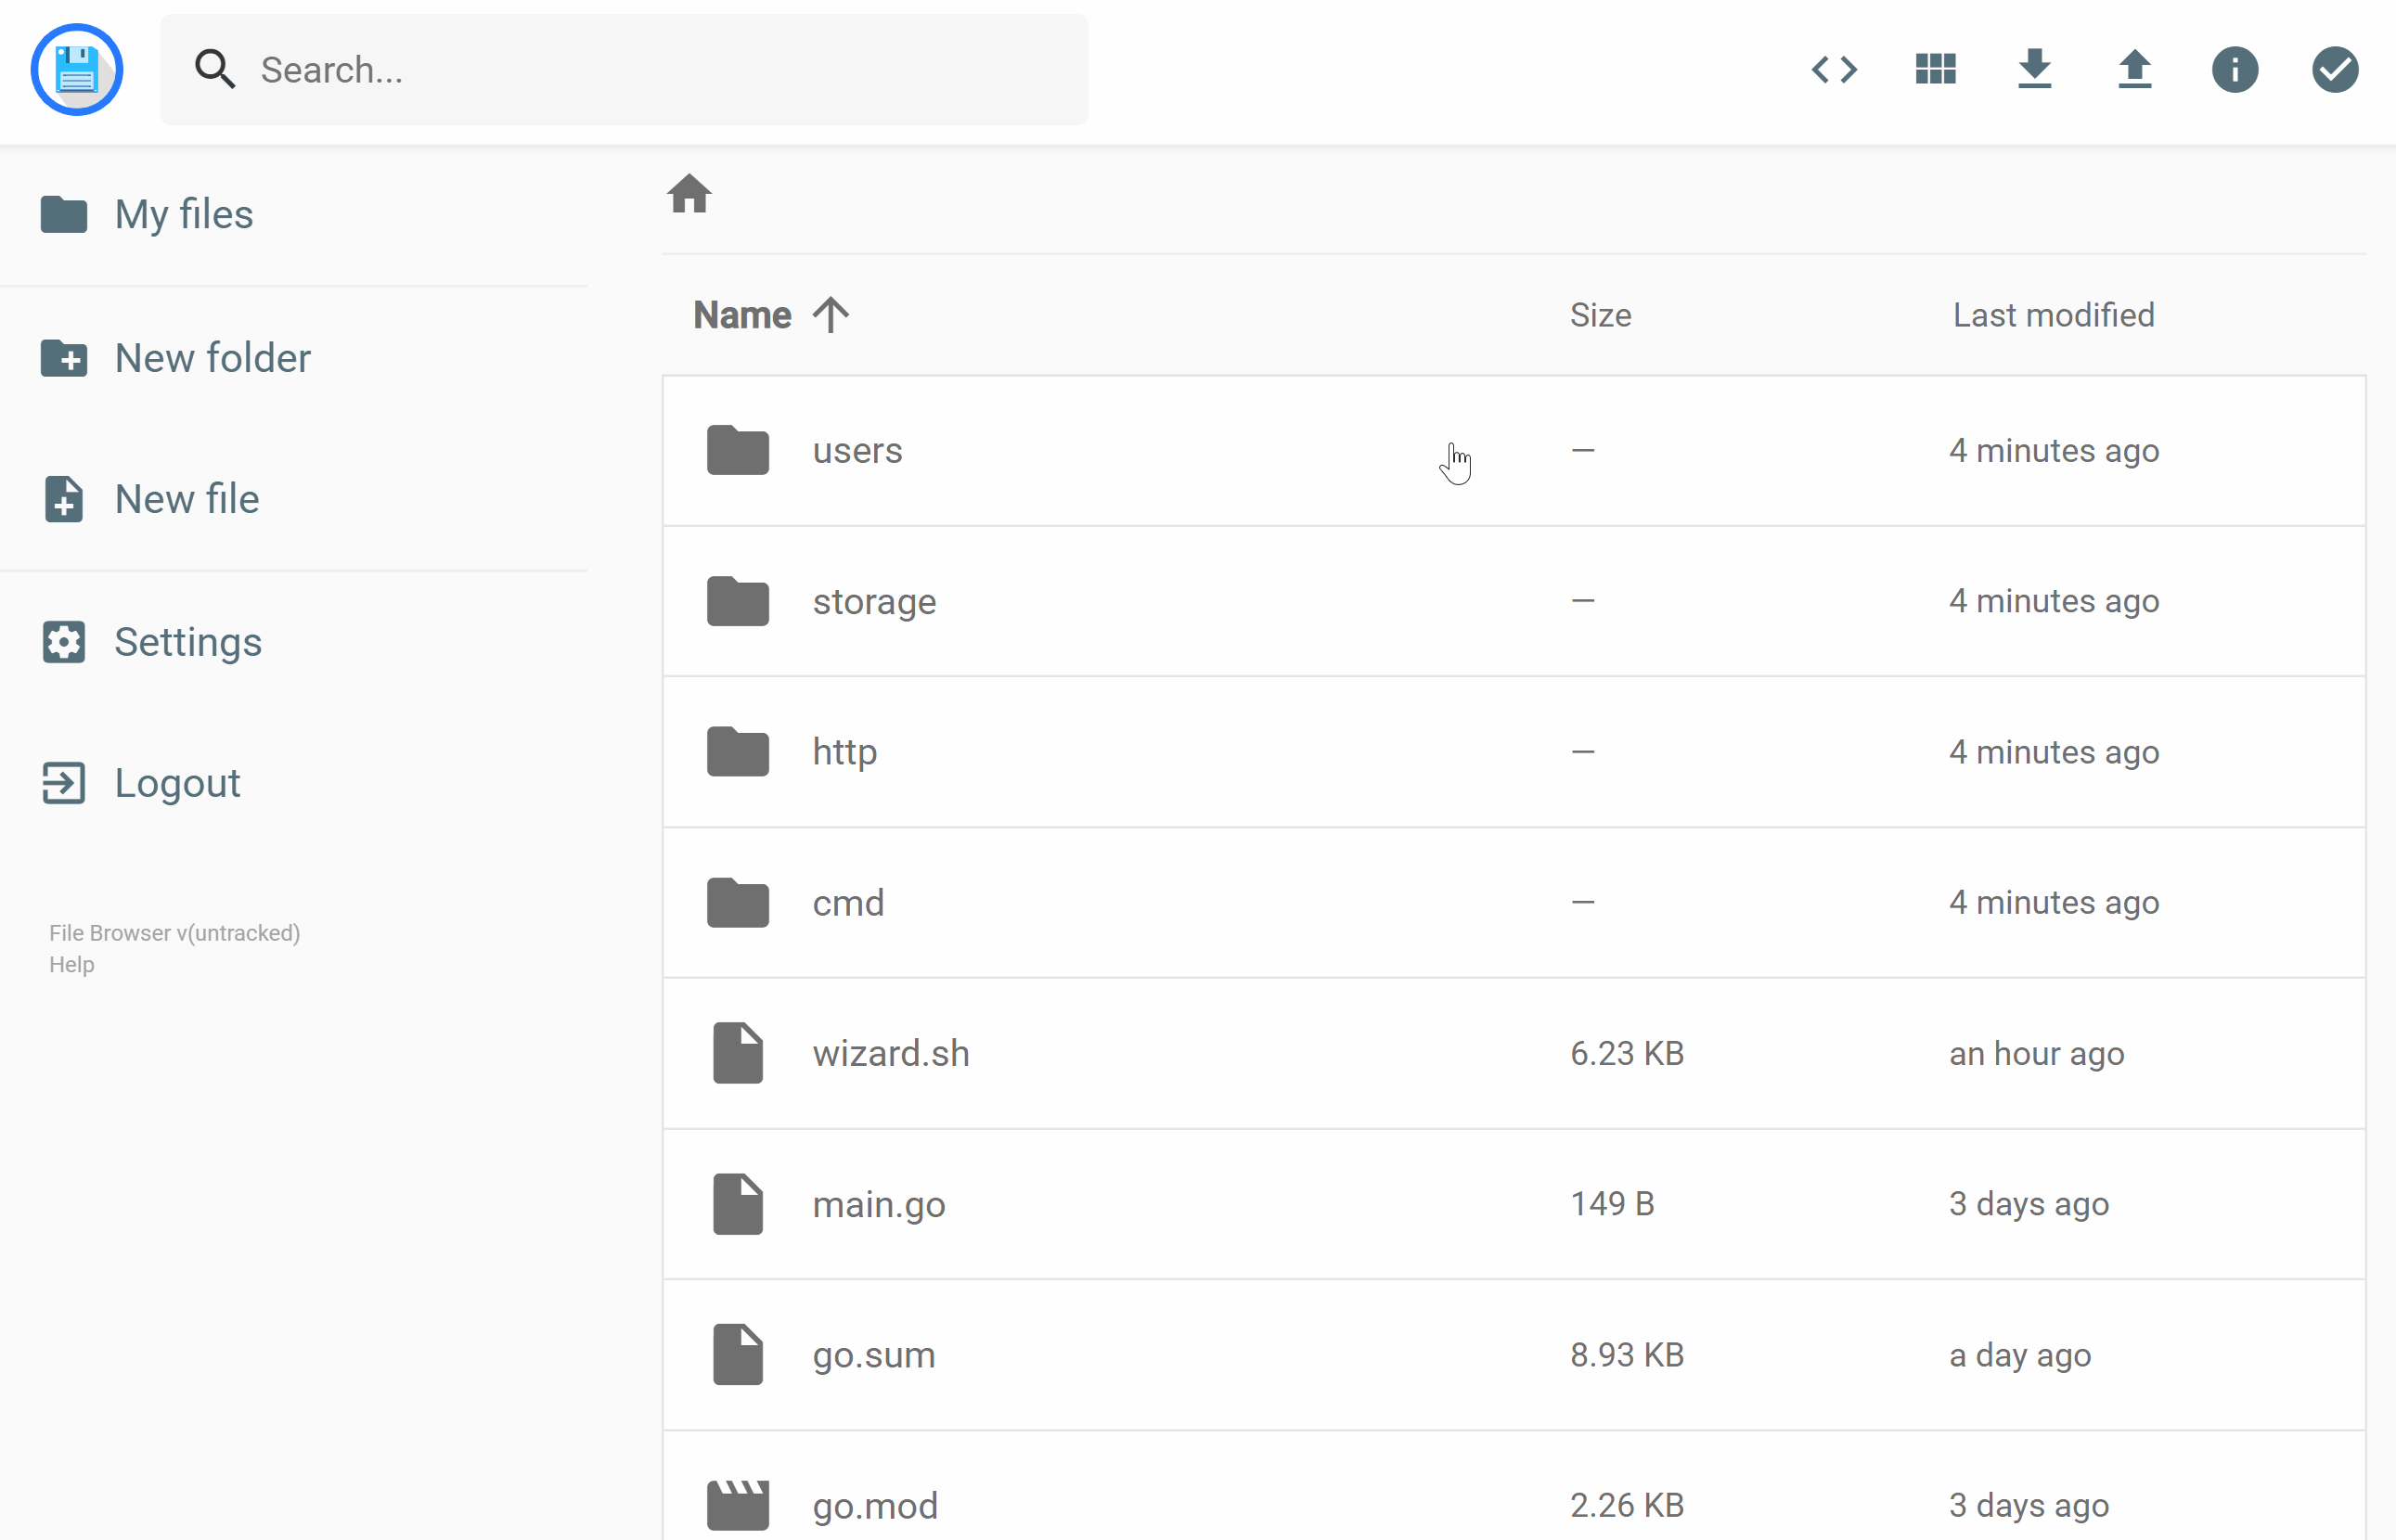
File Browser is a powerful and lightweight tool for managing the files on your server. It provides a clean interface to upload, delete, preview, download, and edit your files smoothly. It has a very easy-to-install script that you can use to run it on your server in minutes. Let’s see how you can install it using Docker —
docker run \
  -v /path/to/srv:/srv \
  -v /path/to/database:/database \
  -v /path/to/config:/config \
  -v /path/to/files:/files \
  -p 8080:80 \
  filebrowser/filebrowser
Where:
/path/to/srvcontains the file’s root directory for the File Browser/path/to/configcontains asettings.jsonfile/path/to/databasecontains afilebrowser.dbfile/path/to/filescontains the files that you want to use in the File browser
Or using docker -compose.yaml
version: "3.8"

services:
  filebrowser:
    image: filebrowser/filebrowser
    container_name: filebrowser
    ports:
      - "8080:80"
    volumes:
      - /path/to/srv:/srv
      - /path/to/database:/database
      - /path/to/config:/config
      - /path/to/files:/files
    restart: unless-stopped
Then run docker compose up -d
For more information, you can visit here.
Jellyfin
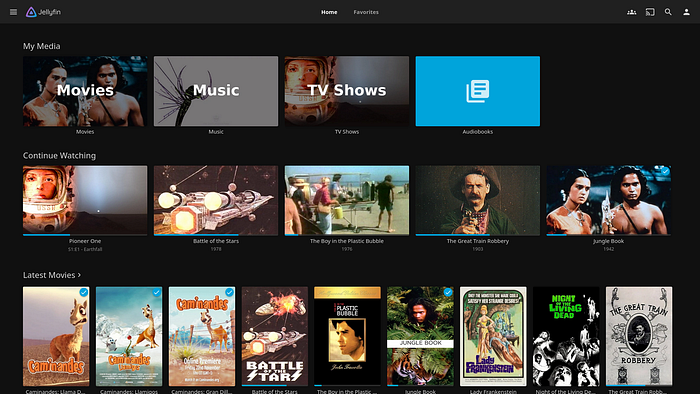
Jellyfin is a Free Software Media System that enables you to control media streaming. It is one of the best open-source alternatives to Emby and Plex, with a lot of new features. I have been using it for a very long time, and it has never disappointed me.
You can easily share and stream videos, movies, music, and photos from your local network to any connected device. I am using it with Docker, so let's see how to install it —
// download the image
docker pull jellyfin/jellyfin

// create dirs
mkdir /path/to/config
mkdir /path/to/cache

// create and run a container
docker run -d \
 --name jellyfin \
 --user uid:gid \
 --net=host \
 --volume /path/to/config:/config \
 --volume /path/to/cache:/cache \
 --mount type=bind,source=/path/to/media,target=/media \
 --restart=unless-stopped \
 jellyfin/jellyfin
Or using docker-compose.yaml
services:
  jellyfin:
    image: jellyfin/jellyfin
    container_name: jellyfin
    user: uid:gid
    network_mode: 'host'
    volumes:
      - /path/to/config:/config
      - /path/to/cache:/cache
      - type: bind
        source: /path/to/media
        target: /media
      - type: bind
        source: /path/to/media2
        target: /media2
        read_only: true
      # Optional - extra fonts to be used during transcoding with subtitle burn-in
      - type: bind
        source: /path/to/fonts
        target: /usr/local/share/fonts/custom
        read_only: true
    restart: 'unless-stopped'
    # Optional - alternative address used for autodiscovery
    environment:
      - JELLYFIN_PublishedServerUrl=http://example.com
    # Optional - may be necessary for docker healthcheck to pass if running in host network mode
    extra_hosts:
      - 'host.docker.internal:host-gateway'
Then run docker compose up -d
For more installation information, visit here.
Syncthing
Syncthing is an open-source tool for continuous file synchronization between two computers, which can be used to create backups. It has a lot of benefits like — saves you from data loss, is safe against attackers, is easy to use, universally available.
Let’s see how to install Syncthing with Docker —
// pull docker image
docker pull syncthing/syncthing

// run dockr container
docker run -p 8384:8384 -p 22000:22000/tcp -p 22000:22000/udp -p 21027:21027/udp \
    -v /wherever/st-sync:/var/syncthing \
    --hostname=my-syncthing \
    syncthing/syncthing:latest
Or using docker-compose.yaml
version: "3"
services:
  syncthing:
    image: syncthing/syncthing
    container_name: syncthing
    hostname: my-syncthing
    environment:
      - PUID=1000
      - PGID=1000
    volumes:
      - /wherever/st-sync:/var/syncthing
    ports:
      - 8384:8384 # Web UI
      - 22000:22000/tcp # TCP file transfers
      - 22000:22000/udp # QUIC file transfers
      - 21027:21027/udp # Receive local discovery broadcasts
    restart: unless-stopped
    healthcheck:
      test: curl -fkLsS -m 2 127.0.0.1:8384/rest/noauth/health | grep -o --color=never OK || exit 1
      interval: 1m
      timeout: 10s
      retries: 3
Then run docker compose up -d
For more installation information, visit here.
Final Thoughts
So I have shown you the best open source tools for your cloud to store and manage files, streaming media like videos, movies, songs, or images, and create and sync backups over the server. You can get started with the easiest to install with Docker scripts in a single command. Let me know if you face any problems.
Thank you for taking the time to read this article! If you found it helpful, a couple of claps 👏 👏 👏 would be greatly appreciated — it motivates me to continue writing more.


