Web Scraping With Selenium In Python

Hello, developers. In this brief lesson, I will teach you “how to use Selenium and its various capabilities to scrape and scan any web page.” From identifying items to waiting for dynamic material to load, we’ve got you covered. Change the size of the window and capture screenshots. To prevent blockages, use proxies and special headers. With our headless browser, you can do all of that and more.
note
Prerequisites
Python3 is required for the code to function. It comes pre-installed on some platforms. After that, install Selenium, Chrome, and the Chrome driver. As of this writing, the browser and driver versions should be the same, the latest Chrome browser.
Install Selenium with PIP
pip install selenium
Other browsers (Edge, IE, Firefox, Opera, and Safari) are supported, and the code should function with little modifications.
Getting Started
Once everything is in place, we’ll create our first test. Print the current URL and title of an example URL. The browser will automatically follow redirection and load all resources, including images, stylesheets, javascript, and others.
from selenium import webdriver

url = "http://zenrows.com"
with webdriver.Chrome() as driver:
driver.get(url)

print(driver.current_url) # https://www.zenrows.com/
print(driver.title) # Web Scraping API & Data Extraction - ZenR
Download chromedriver here
If your Chromedriver is not in an executable path, you must provide it or transfer it to a location in the path (for example, /usr/bin/).
chrome_driver_path = '/path/to/chromedriver'
with webdriver.Chrome(executable_path=chrome_driver_path) as driver:
# ...
You will notice that the browser is visible, haven’t you? By default, it will not operate headlessly. We can provide the driver alternatives, which is what we want to do for scraping.
options = webdriver.ChromeOptions()
options.headless = True
with webdriver.Chrome(options=options) as driver:
# ...
Identifying Elements and Content
Once the website has loaded, we may begin searching for the information we want. Selenium provides numerous methods for accessing items, including ID, tag name, class, XPath, and CSS selectors.
Read in detail here
Assume we want to use the text input to search for anything on Amazon. From the preceding alternatives, we may utilize select by tag: driver.find element(By. TAG NAME, “input”). However, because there are numerous inputs on the page, this might be an issue. We notice that the page contains an ID by viewing it, so we update the selector: driver.find element (By.ID, “twotabsearchtextbox”).
IDs are probably not changed frequently, and they are a more secure technique of retrieving information than classes. The issue is generally that they are not found. Assuming there is no ID, we may choose the search form and then the input inside it.
from selenium import webdriver
from selenium.webdriver.common.by import By

url = "https://www.amazon.com/"

with webdriver.Chrome(options=options) as driver:
driver.get(url)

input = driver.find_element(By.CSS_SELECTOR,
"form[role='search'] input[type='text']")
There is no one-size-fits-all solution; each alternative is suited for a certain set of circumstances. You must select the one that best meets your requirements.
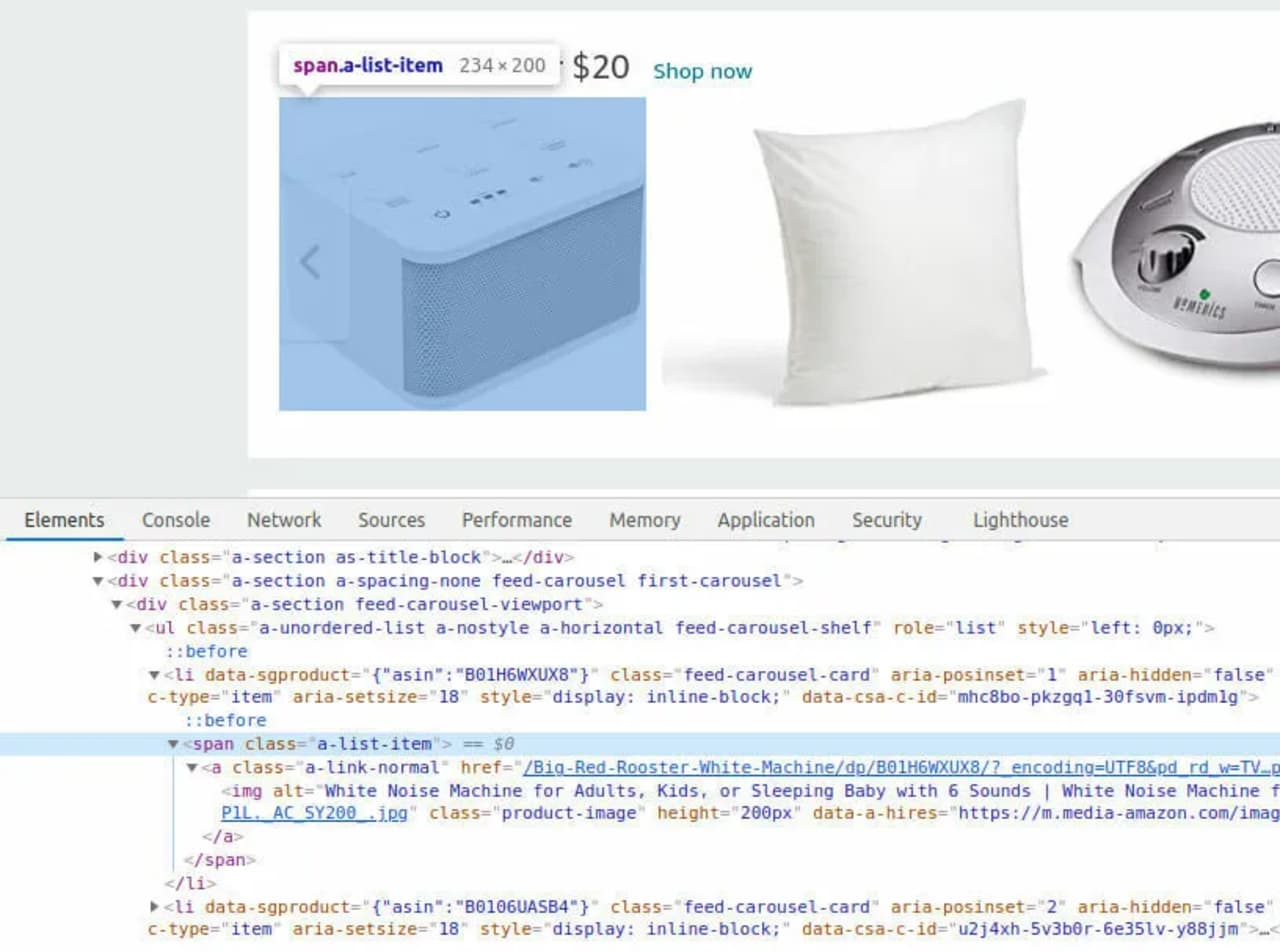
As we browse down the page, we’ll see a plethora of items and categories. And a common class that appears frequently: a-list-item. A similar method (find elements in plural) is required to match all of the things rather than simply the first occurrence.
#...
driver.get(url)
items = driver.find_elements(By.CLASS_NAME, "a-list-item")

Now we must do something with the elements we have chosen.
Getting to Know the Elements
We’ll do a search using the above-mentioned input. To do this, we will use the send keys function, which will type and press enter to send the form. We might alternatively type into the input, then locate and click on the submit button (element.click()). It is simpler in this scenario because the Enter key works properly.
from selenium.webdriver.common.keys import Keys
#...
input = driver.find_element(By.CSS_SELECTOR,
"form[role='search'] input[type='text']")
input.send_keys('Python Books' + Keys.ENTER)
Take note that the script does not wait and exits as soon as the search is completed. The natural next step is to do something, so we’ll list the results using find elements as shown previously. The s-result-item class may be used to inspect the result.
These are divs containing numerous inner tags that we will only choose. If we’re interested, we could take the link’s href values and visit each item; however, we won’t do so for the time being. However, because the h2 tags include the title of the book, we must choose a title for each element. We can keep using the found element because it works for both the driver and any web element.
# ...
items = driver.find_elements(By.CLASS_NAME, "s-result-item")

for item in items:
h2 = item.find_element(By.TAG_NAME, "h2")
print(h2.text) # Prints a list of around fifty items

# Learning Python, 5th Edition ...
Don’t depend too heavily on this method because some tags may be empty or lack a title. We should properly design error control for a real-world use case.
Element Screenshots and Screenshots
Screenshots are a useful tool for both testing and storing changes. We can capture a snapshot of the current browser context or a specific element.
# ...
driver.save_screenshot('page.png')

# ...
card = driver.find_element(By.CLASS_NAME, "a-cardui")
card.screenshot("amazon_card.png")

Run Javascript
The final Selenium feature we’d like to highlight is Javascript execution. Some tasks are simpler to complete directly in the browser, or we want to ensure that everything is performed properly. We may use execute a script to pass the JS code to be run. It can be used with or without parameters.
In the examples below, we can see both scenarios. There is no need for params to obtain the User-Agent as seen by the browser. That may be useful for ensuring that the one sent is being updated appropriately in the navigator object, as some security checks may raise red flags otherwise. The second will accept an h2 as an input and use getClientRects to return its left location.
with webdriver.Chrome(options=options) as driver:
driver.get(url)

agent = driver.execute_script("return navigator.userAgent")
print(agent) # Mozilla/5.0 ... Chrome/96 ...

header = driver.find_element(By.CSS_SELECTOR, "h2")
headerText = driver.execute_script(
'return arguments[0].getClientRects()[0].left', header)
print(headerText) # 242.5
Conclusion
Selenium is a powerful tool with several uses, but you must use it in your unique way. Use each feature to your advantage. And, many times, there are several paths to the same destination; choose the one that will benefit you the most — or is the simplest.
Once you’ve gotten the hang of it, you’ll want to expand your scrape and obtain additional pages. Other obstacles may occur here, such as crawling at scale and blocks. Some pointers are provided above to assist you: Examine the header and proxy sections. However, keep in mind that crawling at scale is a difficult task. Please do not claim that we did not warn you.
I hope you’ve gained a better knowledge of how Selenium works in Python (it goes the same for other languages). Don’t forget to share this article on social media to help me to write more articles like this in future. Thank you for reading.


